
Introduction: The Gear Dilemma We All Face
I’ll start with a confession: I used to hate tripods on the trail—honestly, they felt like medieval contraptions strapped to my back. Then one evening, I set up under a cloudless sky to capture the Milky Way and… yep, ended up with blurry blobs of light. Perhaps that was my turning point. In this guide, we’ll unpack (pun intended) why a backpacking-style tripod is non-negotiable if you actually want sharp, epic vistas without feeling like you’re carrying a cinder block. We’ll touch on the classic tug-of-war between keeping things feather-light and keeping them rock-steady, then preview how the article flows: must-have features, our top picks for 2024, proper setup and maintenance, common pitfalls, and a wrap-up that’ll leave you itching to hit “Buy Now”—or at least comment with your own horror stories. And yes, I might derail into a side tale or two—because that’s how real conversations go, right?
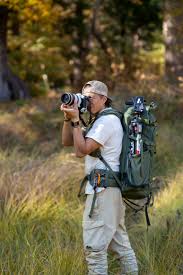
1. Why You Need a Backpacking Tripod
Stability for Unforgettable Shots
When I first tried a standard studio tripod on a windy ridge, the legs shook like they’d had too much coffee. Switching to a backpacking model meant I finally got those long exposures without my camera doing the jitterbug. And no, you don’t need to live life on the edge to appreciate solid support—landscapes, nightscapes, even your shaky-handed friend’s travel vlog will thank you.
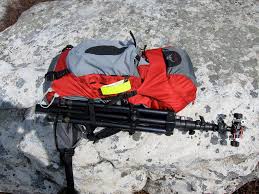
Compactness Meets Convenience
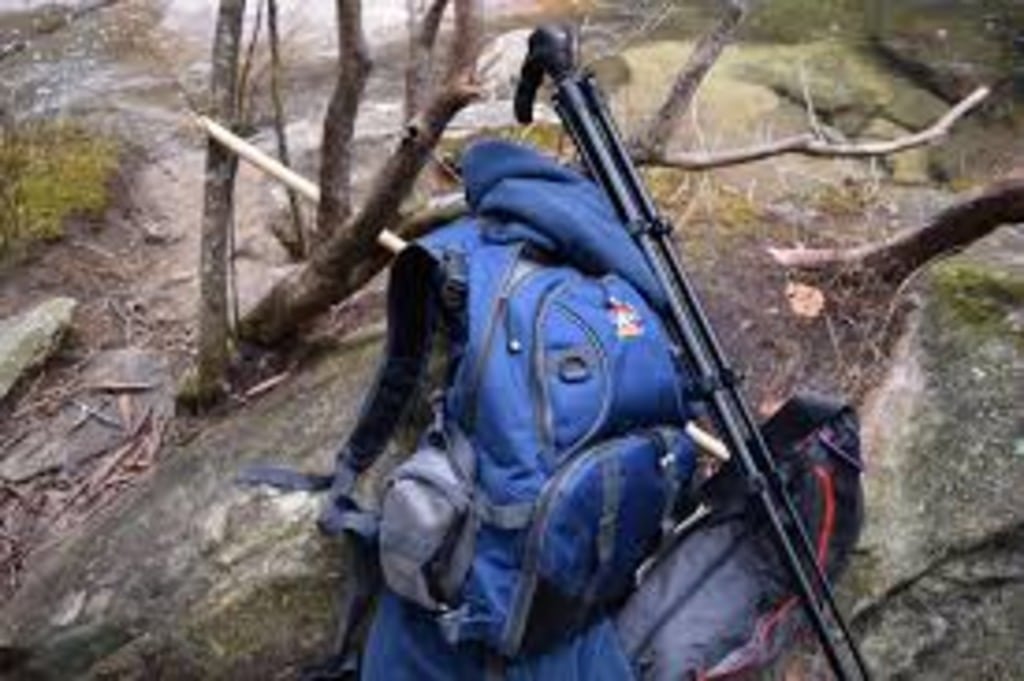
I can’t stress enough how frustrating it is to have gear poking out of your pack, snagging on branches, or throwing off your center of gravity. A good backpacking tripod folds down to around fifteen inches, tucks neatly into your pack’s side pocket, and—here’s the kicker—doesn’t require a strategic shimmy just to close your bag. You’ll thank yourself on mile eight.
Versatility Across Terrains
From granular sand dunes to jagged mountain scree, you’ll find that the right feet and materials make or break your outdoor shoots. I once swapped out rubber feet for spikes on a frosty dawn shoot—it was the difference between slipping and perfect framing. You’ll see why adaptability matters when we dive into feature breakdowns.
Beyond Photography—Video & Vlogging
Okay, so maybe you’re not a stills photographer. If you’re shooting timelapses or vlogging on the go, a stable rig keeps your footage smooth, and a quick‐release plate saves those precious seconds when the light changes.
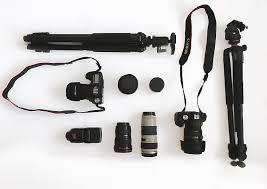
2. Key Features to Consider
Weight & Packability
Let’s talk numbers, but only a little. Somewhere around two to three pounds seems sweet for most hikers—light enough to not notice after a couple miles, heavy enough to feel stable under moderate wind. And yes, the magic number for folded length hovers near fifteen inches, give or take. It’s oddly satisfying when a tripod just slides in without a fight.
Material Matters: Carbon Fiber vs. Aluminum
Carbon fiber almost reads like science fiction—ultra-light, dampens vibrations as though by voodoo, yet prices can make your wallet wince. Aluminum, on the other hand, is that reliable friend: a touch heavier but endlessly durable and budget-friendly. I’ve owned both and—no surprise—sometimes I miss the sturdiness of aluminum more than the feather-weight feel of carbon.
Load Capacity and Safety Margins
Check your camera’s heft—mirrorless rigs are lighter, DSLRs with big telephotos weigh a ton. I like adding about twenty percent headroom so I’m never wondering if my tripod will collapse if a squirrel hops on. That extra buffer feels like an insurance policy for my precious glass.
Height Range & Stability Trade-Offs
Consider your shooting style: low-angle leaf-lit close-ups or full-height eye-level landscapes? Minimum height can be just a few inches, but maximum height—especially with a center column extended—varies wildly. Leg locks come in flip and twist varieties; I’ve flailed with both, so I’ll share why one might give you fewer surprises on uneven ground.
Head Types: Ball vs. Pan-Tilt
Here’s where opinions diverge: ball heads let you swivel and click into place faster than you can say “cheese,” while pan-tilt heads offer slower, more precise adjustments—perfect for video pans if you’re into that. I juggle both depending on the day; sometimes I can’t decide either, and that’s okay.
Feet & Terrain Adaptation
Rubber feet are nice for sandy beaches or pavement, but once you trek into snow or mud, metal spikes become your best friends. And that little hook under your center column? It’s not decorative; it’s for hanging your bag as a makeshift weight to keep the whole rig from going airborne in gusts.
Budget Brackets and Value Picks
On a shoestring budget—sub-$100—you’ll find decent entry-level options that suffice for casual outings. The mid-range ($100–$250) often hits the sweet spot for hobbyists who want reliability without maxing the credit card. Above $250, you’re in premium territory with pro-grade build and feather-light performance, but sometimes that premium isn’t worth your particular needs. More on that in our recommendations.
3. Top Backpacking Tripod Recommendations (2024 Picks)
Best Overall: Peak Design Travel Tripod
After testing in rain, wind, and suspiciously muddy festivals, this carbon-fiber wonder weighed in at 2.8 pounds, folded ridiculously small, and barely budged under a stiff breeze. It is pricey—no sugar-coating—but if you spend serious time outdoors, it feels worth the splurge.
Best Budget Option: 3Legged Thing Punks Corey
For under a Benjamin, you get an aluminum frame that’s rugged enough to handle DSLR plus medium telephoto. It’s chunkier, yes, but I didn’t once worry about it crumpling when I set it down hard (not that I recommend that).
Best for Heavy Gear: Gitzo Mountaineer Series
If you’re hauling a full-frame DSLR and a 70–200 mm lens, this tripod is like the bodyguard you didn’t know you needed. It’s overkill weight-wise for light rigs, but its carbon-fiber legs and rock-solid leg locks make it a fortress against shake.
Best Ultralight: Zomei Z699C
Weighing in under two pounds, it’s the go-light, go-far champion for thru-hikers. Stability in wind? Not as good as heavier twins, so I’d point it more toward mirrorless shooters who can sacrifice a bit of steadiness for every saved ounce.
Honorable Mentions
It’d feel wrong not to salute a few runners-up—like the Manfrotto BeFree (great ball head action) or the Sirui T-025X (stellar aluminum option). They didn’t top our charts, but they deserve a nod for special use cases.

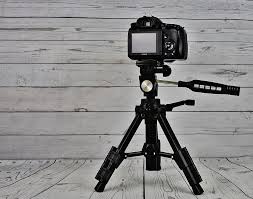
4. How to Use & Maintain Your Backpacking Tripod
Field Setup Tips
First rule: extend the thickest leg sections before the thinner ones—that single habit improved my tripod’s steadiness by leaps and bounds. If a gust decides to ruin your shot, hook your pack beneath as a counterweight, and feel smug. Also, double-check that all leg locks are fully tightened before you step back to frame your shot—trust me.
Cleaning After the Shoot
Whether you’ve photographed sandy shores or dusty trails, salt and grit are stealthy enemies. Rinse thoroughly with fresh water, but avoid high-pressure sprays on the leg locks—they’re precise mechanisms, not fire hoses. A gentle stream and a soft brush go a long way.
Drying & Storage Best Practices
Let every component dry fully before stashing away—trapped moisture leads to corrosion in places you can’t see until it’s too late. And here’s a minor quirk: I loosen my head’s locking knobs slightly before storage to ease tension on internal parts. It’s a small step that just might extend its lifespan.
5. Common Mistakes to Avoid
Overlooking Weight vs. Load Specs
Buying the lightest model without checking it can hold your heaviest rig is, well, classic rookie move. I learned that the hard way mid-sunset shoot—camera on the ground, tripod partially collapsed. Ouch.
Ignoring Folded Length Constraints
That sleek tripod that looked great in photos may be five inches too long to squeeze into your pack’s side pocket. Double-check dimensions before you click “Add to Cart.”
Misreading Terrain-Specific Foot Types
Rubber feet slipping on frosty mornings, or spikes sinking into loose sand—each terrain demands its own solution. Some tripods let you swap feet; others… not so much. Know before you go.
6. Frequently Asked Questions
Can I Use a Backpacking Tripod for Studio Work?
You can, but be prepared for a lower maximum height and sometimes lighter-duty heads. It’ll work in a pinch, but dedicated studio tripods exist for a reason.
How Do I Know When to Replace My Tripod?
If leg locks start slipping, or corrosion shows up after a thorough cleaning, it’s time to upgrade. Also, if you find yourself asking “why is this wobbling?”—trust that gut feeling.
No Comment